CHAPTER 04 / 06
Chapter 4: Wheels, axles, and snap-on rivets
The Worm Farm tractor needs wheels that turn and stay on. A wheel glued to a body cannot roll. A wheel slipped over an open rod falls off. We will print a kit and hold each wheel with a small split rivet.
Lay out eleven pieces
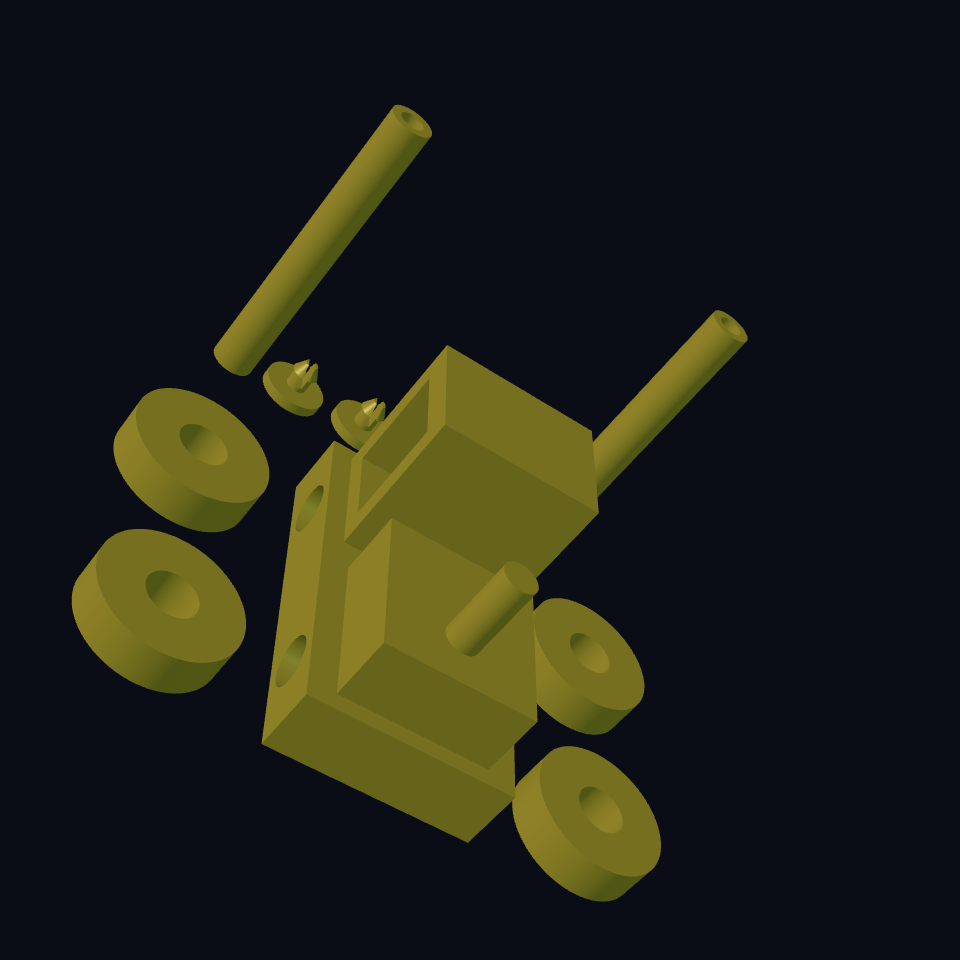
Count one body, two axles, four wheels, four rivets: eleven separate pieces. No metal rods, glue, or bought fasteners are part of this design.
The body has two sideways holes. Slide an axle through each hole, put a wheel on either end, then push a rivet into each hollow axle end. Its wide head keeps the wheel on.
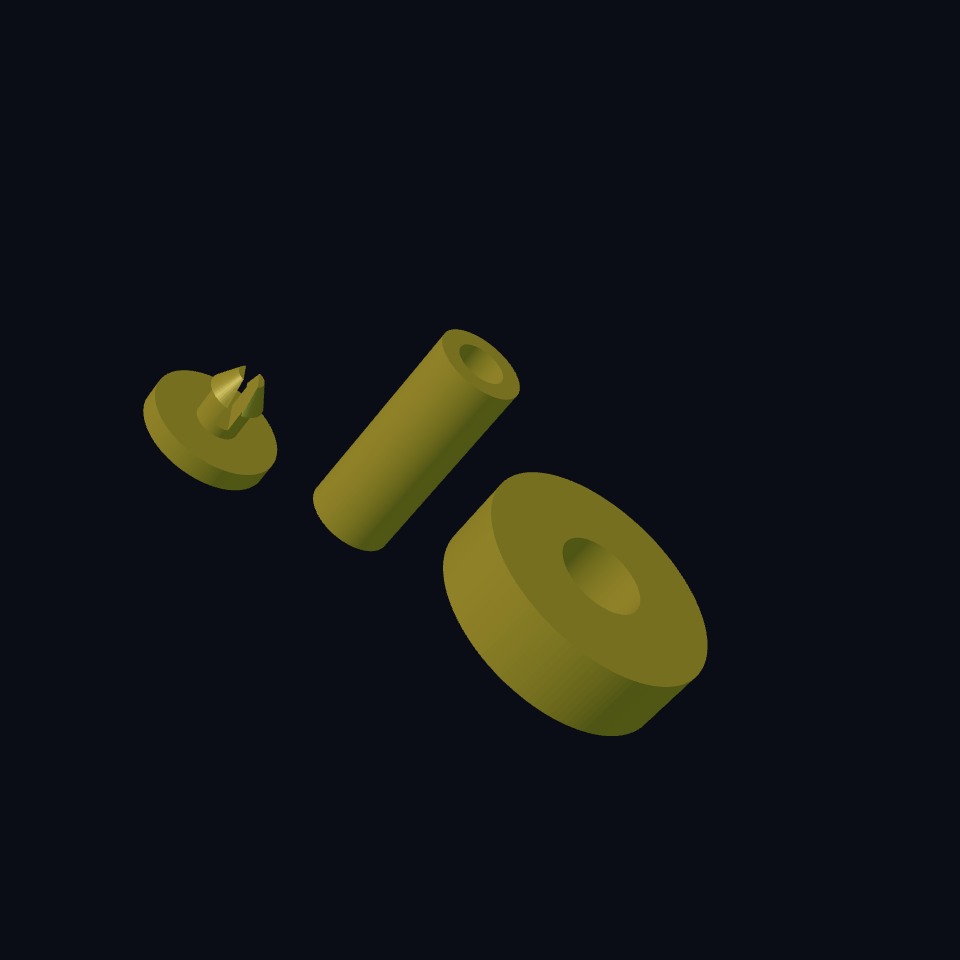
Start with the small axle–wheel–rivet sample. It uses the exact same component recipes as the tractor, with a shorter axle. Print these three pieces before the whole kit. Put the wheel on the axle, push the rivet in, then check: does the wheel turn, and does it stay on when pulled gently?
Leave space for the wheel
The axle radius is 3.2 mm. The wheel hole radius is axle-radius + wheel_clearance: 3.6 mm at the default. That leaves 0.4 mm per side for rotation.
The body is 30 mm wide. Each wheel's inner face sits 2 mm away from it. A second gap, wheel-end-play, leaves 0.6 mm between the wheel's outer face and the rivet head. The head holds the wheel without squeezing it against the body.
These gaps have different jobs. A wheel that rubs needs room to spin. A rivet that falls out needs a better catch. Changing one should not silently change the other.
Let the rivet squeeze, then catch
Picture the rivet in four pieces, all printed as one shape:
- A broad, flat head stops outside the axle.
- A narrow stem enters its hole.
- A tapered tip guides it in. Behind that tip is a wider barb.
- A slot splits the stem into two flexible legs; the head remains whole.
The axle mouth radius is 1.8 mm. The barb radius adds snap_interference, normally 0.25 mm. The legs must squeeze inward while passing through the mouth, then open inside a wider pocket. The pocket's shoulder catches the barb. The head stays outside and retains the wheel.
The source calls the opening's depth lip-depth; the barb sits behind that lip after insertion. The slot stops above the head, so the rivet remains one connected piece. Never fuse the rivet to the axle to make a check pass.
The small sample decides the printed fit. If the wheel binds, increase wheel_clearance. If the rivet takes too much force, reduce snap_interference; if it slips out, inspect the barb and pocket before increasing it. CAD geometry does not establish how a particular filament will bend. Let an adult help print and assemble small pieces.
Reference: difference, define-component.
Print flat, inspect assembled
print_layout starts on. Wheels lie flat with their holes facing up, rivets rest on their heads, axles stand on their ends, and the body rests on its underside. Separate the eleven shells in your slicer if it treats the STL as one object. Inspect the cabin roof and axle bores for bridging settings.
Turn print_layout off to inspect the assembled tractor. The same component recipes move and turn into position. This switch changes exported geometry too: turn it on again before exporting the kit. It is not a preview-only view.
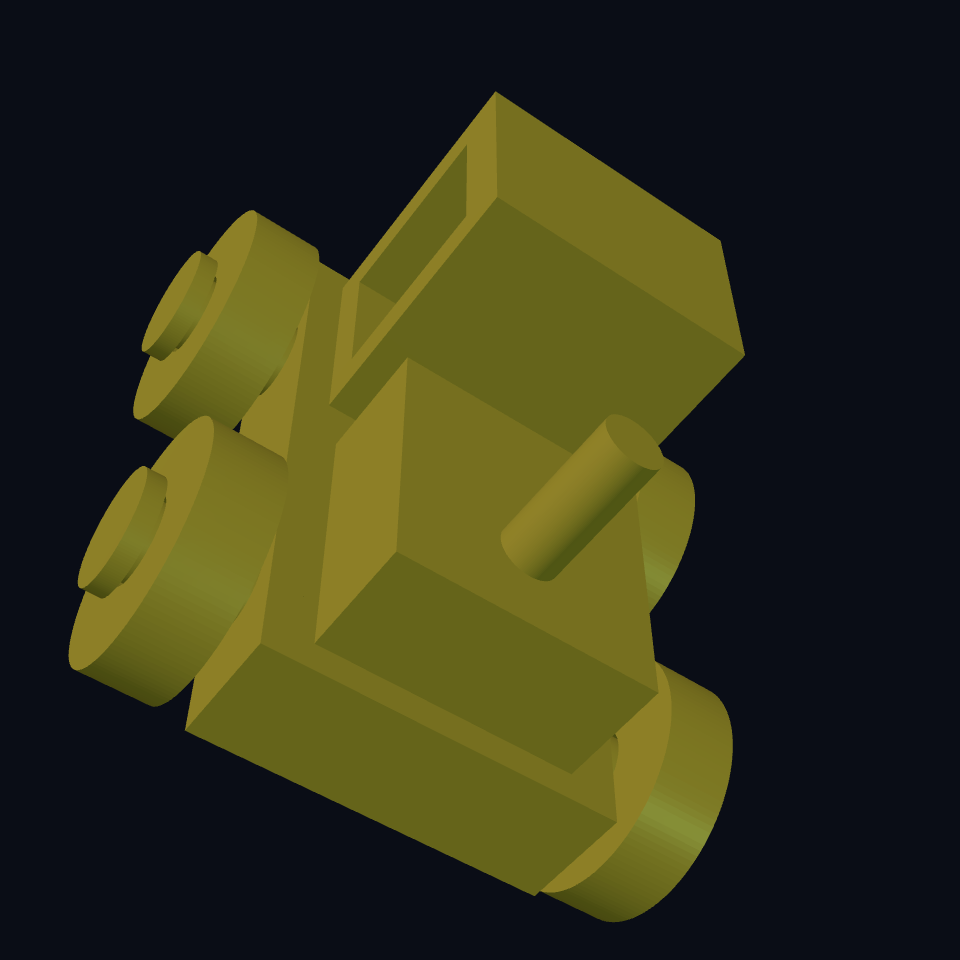
The two repeats choose a side and an axle. Four calls make four wheels, then four more calls make the rivets. All share the named fit dimensions.
Open the complete kit
Read the component names first: tractor-chassis, tractor-axle, tractor-wheel, tractor-rivet. You do not need to type every line. Start by changing one measured gap in the sample.
; Print the kit flat, then fit wheels to the axles and push in split rivets.
(define-component tractor-chassis ((number axle-radius 3.2mm) (number body-clearance 0.3mm))
  (let* ((axle-height 5mm)
         (body (box 30mm 50mm 10mm))
         (engine (translate 0 -11mm 10mm (box 22mm 23mm 10mm)))
         (chimney (translate 0 -15mm 20mm (cylinder 2.5mm 12mm)))
         (cabin (translate 0 14mm 10mm
           (difference (box 24mm 18mm 23mm)
             (translate 0 0 3mm (box 26mm 12mm 16mm)))))
         (axle-bores (repeat-compound i 2
           (translate 0 (+ -15mm (* i 30mm)) axle-height
             (rotate 0 90deg 0
               (cylinder (+ axle-radius body-clearance) 34mm :align '(center center center)))))))
    (difference (union body engine chimney cabin) axle-bores)))

(define-component tractor-axle
  ((number axle-radius 3.2mm) (number axle-length 47.2mm)
   (number mouth-radius 1.8mm) (number cavity-radius 2.35mm)
   (number lip-depth 2.2mm) (number socket-depth 5.5mm))
  (difference
    (cylinder axle-radius axle-length)
    (translate 0 0 -1mm (cylinder mouth-radius (+ axle-length 2mm)))
    (translate 0 0 lip-depth (cylinder cavity-radius (- socket-depth lip-depth)))
    (translate 0 0 (- axle-length socket-depth)
      (cylinder cavity-radius (- socket-depth lip-depth)))))

(define-component tractor-wheel
  ((number radius 10mm) (number width 6mm)
   (number axle-radius 3.2mm) (number running-clearance 0.4mm))
  (difference (cylinder radius width)
    (translate 0 0 -1mm
      (cylinder (+ axle-radius running-clearance) (+ width 2mm)))))

(define-component tractor-rivet
  ((number mouth-radius 1.8mm) (number snap-interference 0.25mm)
   (number head-radius 4.8mm) (number head-thickness 1.6mm))
  (let* ((stem-radius (- mouth-radius 0.2mm))
         (barb-radius (+ mouth-radius snap-interference))
         (barb-base 4.3mm)
         (slot-bottom (+ head-thickness 0.8mm)))
    (difference
      (union
        (cylinder head-radius head-thickness)
        (translate 0 0 (- head-thickness 0.2mm) (cylinder stem-radius 3.1mm))
        (translate 0 0 barb-base (cone barb-radius 1mm 1.9mm)))
      (translate 0 0 slot-bottom (box 1.1mm 8mm 5mm)))))

(model
  (meta :title "Snap-together tractor")
  (params
    (number wheel_radius 10mm :label "Wheel radius" :min 8 :max 12 :step 1)
    (number wheel_clearance 0.4mm :label "Wheel running clearance" :min 0.2 :max 0.6 :step 0.05)
    (number snap_interference 0.25mm :label "Rivet snap interference" :min 0.1 :max 0.35 :step 0.05)
    (toggle print_layout true :label "Print layout (changes export)"))
  (let* ((axle-radius 3.2mm)
         (body-half-width 15mm)
         (wheel-width 6mm)
         (wheel-side-gap 2mm)
         (wheel-end-play 0.6mm)
         (wheel-center (+ body-half-width wheel-side-gap (/ wheel-width 2)))
         (axle-half-length (+ body-half-width wheel-side-gap wheel-width wheel-end-play))
         (axle-length (* 2 axle-half-length))
         (rivet-head-thickness 1.6mm)
         (body-lift (- wheel_radius 5mm)))
    (part chassis
      (translate 0 0 (if print_layout 0mm body-lift)
        (tractor-chassis :axle-radius axle-radius)))
    (part axles
      (repeat-compound i 2
        (let* ((axle (tractor-axle :axle-radius axle-radius :axle-length axle-length)))
          (if print_layout
            (translate (+ -28mm (* i 56mm)) 46mm 0 axle)
            (translate (- axle-half-length) (+ -15mm (* i 30mm)) wheel_radius
              (rotate 0 90deg 0 axle))))))
    (part wheels
      (repeat-compound side 2
        (repeat-compound i 2
          (let* ((sign (- (* side 2) 1))
                 (wheel (tractor-wheel :radius wheel_radius :width wheel-width
                   :axle-radius axle-radius :running-clearance wheel_clearance)))
            (if print_layout
              (translate (* sign 32mm) (+ -15mm (* i 30mm)) 0 wheel)
              (translate (* sign (- wheel-center (/ wheel-width 2)))
                (+ -15mm (* i 30mm)) wheel_radius
                (rotate 0 (* sign 90deg) 0 wheel)))))))
    (part rivets
      (repeat-compound side 2
        (repeat-compound i 2
          (let* ((sign (- (* side 2) 1))
                 (rivet (tractor-rivet :snap-interference snap_interference
                   :head-thickness rivet-head-thickness)))
            (if print_layout
              (translate (+ -18mm (* side 24mm) (* i 12mm)) 46mm 0 rivet)
              (translate (* sign (+ axle-half-length rivet-head-thickness))
                (+ -15mm (* i 30mm)) wheel_radius
                (rotate 0 (* sign -90deg) 0 rivet))))))))
  (verify
    (tag eleven-printable-pieces)
    (metric pieces (stl connected-component-count))
    (expect pieces (= 11)))
  (verify
    (tag closed-surfaces)
    (metric bad-edges (stl non-manifold-edge-count))
(expect bad-edges (= 0))))Try a useful failure
- Render the kit and run verification. Expect eleven closed, separate pieces.
- Inspect assembly mode. Follow the axle through the body and both wheels; find the two retaining heads.
- Increase
wheel_radiusfrom 10 to 12. Wheels grow and the body rises; axle and rivet fits stay unchanged. - In the sample, temporarily make the rivet slot pass through its head. The rivet splits into two pieces: a real design error. Restore the slot's bottom before printing.
You can now: design a running gap and a snap catch, reuse exact mating parts in a cheap sample, and distinguish printable layout from assembled placement. Next comes a joint that bends in more than one direction.